Wednesday, September 24, 2014

Choosing Wedding Rings and Engagement Rings
The tradition of wedding rings have lasted thousands of years ago. Indeed, there is no data exactly when the ring began to be used for marriage. But some literature mentions in ancient Roman times many couples use a simple metal plate as a sign of bonding.

The ring is a symbol bond of love of all time and universally applicable. Its became a marker of the beginning of a relationship and explain the status of the wearer. The ring on the left ring finger as if to speak: Hey, leave me alone, I'm with somebody. They believe the circular ring as a symbol of eternal love.

Centuries later adopted the tradition of the western world. The ring is considered as a symbol of love and trust that characterizes the relationship of men and women. Sometimes given before marriage, known as the engagement ring, it could be when the marriage ceremony known as wedding ring.

Symbols In the ring

In the development of the shape and design of the ring - the ring evolved. In ancient Roman times, for example, there is known as a key model rings made of brass, bronze, or iron. This ring as a symbol to enter the house and the husband may use his property. Key rings particular model used to open the jewelry box.

Diamond rings ranging widely used in the engagement began in the 18th century Europe, there are several reasons that make the diamonds become so popular, that it emits beauty, strength and diamond mines are found in Brazil.

Noble women usually use a large diamond for earrings, tiaras, necklaces, and bracelets. But for them to wear small diamond ring or fine silver tied on a gold ring is Queen Charlotte, wife of King George III of England is called the first time chose a diamond-studded ring for his marriage. The queen is known as the Queen of Diamond.

Choosing rings At present, a variety of wedding rings available in various models and materials are very varied. But a wedding ring is the most commonly used base material using gold or platinum. The gold appears in a variety of colors such as yellow, pink or white as platinum. Levels of rust which is commonly used is 18 carat gold. Pure 24 carat gold wedding ring less suitable because of the nature of the metal is soft so easy to change due to daily use.

Another option is a silvery-white sheen of platinum-colored classic style. As with gold, the value of this ring is determined the levels of a mixture of other metals such as iridium and ruthenium. For the price of platinum based ring is relatively more expensive than gold.

Generally simple wedding ring design. Many couples choose a plain design as practical for daily use. If they want to be special, the choice is with a touch of jewels on gold or platinum ring. Diamonds are still the most popular choice to date.

In selecting a suitable wedding rings there are several things that can be used as a guide.

Budget
Price wedding ring is usually determined by the type of material, rust and severity level. As well as additional ornaments like-diamonds. For a certified diamond wedding ring, for example, the price is definitely more expensive than a regular ring. When a limited budget can be circumvented by reducing the weight, concentration, and simple models. For the price of precious metals is generally the same. You can save money by finding a cheaper cost of manufacture.

Model
Beautiful least rings usually be the first consideration in choosing. You can choose a ring or looking directly at the store and asked for a reference model of special. In choosing the model you need to remember, unlike other rings, wedding rings will be used forever (ideally). So consider also its shape, what does not interfere with the activity, whether the design will last a long time and not get stale. Do not forget to consider the two rings look beautiful in your hand. Choose what will diengrave posts inside the wedding ring. Usually the wedding date or the name of her partner. Choose a wedding ring that favored both partners and choose a design that is self-sustaining. You can bring an example of a dress that you will wear on the day of your wedding to adjust to the shape or ring models and accessories.

Materials
It is not only related to the budget or taste, in determining the choice of materials, should also consider the health aspect. What are you allergic to ingredients - certain ingredients. In some cases, a person sweat react differently to certain ingredients. When buying a diamond ring do not forget to pay attention to 4C (Carat, Clarity, Cut and Color).

Size
Do not buy a ring without trying it. The ring should be comfortable and attached to the fitting on the finger, not to narrow, ill-fitting, or the color does not match the color of your skin. The tradition of the left ring finger on your left hand is commonly used for wedding rings. There is no fixed rule on this subject but this tradition is so popular and universally apply this tradition supposedly originated from the ancient Roman belief that mentions that the left ring finger vein amoris are related directly to the heart. Practical reasons are also often raised, left hand ring finger is considered as the least used so that the ring is relatively safe to use.

Do not forget to bring gloves that you will wear on the wedding day if you are going to wear gloves while trying to avoid mistakes wedding ring size.

Tuesday, June 10, 2014

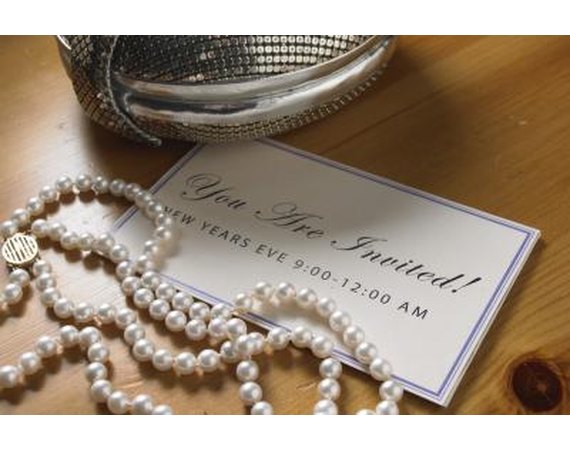
Unique Wedding Invitations
Why should create unique wedding invitations? Marriage is a very special moment for couples who will begin their family life. Therefore, invitations to events and wedding receptions already contract should be designed as attractive as possible so that it becomes a unique wedding invitation.

Expected of interesting unique wedding invitations, the couple can appreciate and give the impression of love to special people who have been faithful to accompany them while still single and after marriage oath of loyalty.

Unique wedding invitation said if the invitation is different with invitations in general. Perhaps among us had ever seen in person or receive a unique wedding invitation from a friend or colleague. So we ask, how to make invitations like this? Where is the message? How to write an invitation like this?

The questions that arise because we wonder or awe at the unique creations wedding invitations sent by friends. Interested to make the invitation? then you should read this article.

Something unique for sure attract attention and get people to easily remember. Similarly, the wedding invitations, unique wedding invitations will be easily stored in the memory of people who read or saw.

So many types of unique wedding invitations that have been circulating or produced around us, especially those living in urban areas. Bercitra bustling city in the world of work or the noise of a motor vehicle forming townspeople always looks stressed and tense-faced. It is better if we tried to make our friends smile and forget penatnya daily activities of unique wedding invitations while viewing the work of our own.

Unique Wedding Invitations and Sympathetic


Do you crave for a unique wedding invitation? Implement marriage already is incumbent upon every man and woman who had grown up. Marriage is actually intended to serve the Lord Almighty so expect to marry someone of a lifetime.

Choosing the right partner for him for the next life with full of happiness. Marriage is expected as a means to further identify the selected partner. In addition, of course to get a descent through the halal way by religion.

Planning a beautiful wedding is the desire of every couple. All people are always hoping lived marriage is the wedding of a lifetime. For that, all things in the organization of the wedding should be as perfect and beautiful as possible. Every man and woman will be united in holy matrimony to perform the marriage ceremony.

Marriage not only unites man and woman, even unite the two great families. Beautiful moment is of course necessary, witnessed by all the people we know, be it friends, friends, and brothers and sisters.

Various things must be considered in planning a wedding reception, such as the selection of the bride wedding dress, the theme of the wedding reception, wedding that will be used, searching the building for the reception, choose a cake, and no less important is choosing the wedding invitation card. Unique invitations can be made alone, can also be made through the services of a designer.

Sunday, June 1, 2014

Living in the US makes one feel free - free to do anything, free to live, free to love, free from traditions.  While this is true, there are still many practices done during wedding that renders this memorable event with a distinct American touch.  Here are some:

Starting from the engagement, Americans can think of unique ways to personalize their wedding.  As there really isn't any engagement tradition, the more unique the marriage proposal is done, the better.

For most wedding preparations, the engaged couple visits their parents to inform them of their recent engagement.

At times, the engaged couple hosts an engagement party.  The engagement party costs less than a wedding reception since most of the time, the menu will only include cocktails and hors d'oeuvres.  Therefore, if the couple is on a tight budget, they can just invite more guests to the engagement party if they plan to limit the number of guests during the wedding.

Most wedding preparations have a bridal shower given by the maid of honor and the bridesmaids.  The groom may also have a bachelor party the night before the wedding but he has to be careful not to drink too much.

Wedding invitations should include response cards to quickly inform the couple whether the person has accepted or declined the invitation.  The wedding invitations should also be sent within four to six weeks before the event.

Usually, there is a rehearsal dinner in which the wedding party and guests came from far places to be present at the wedding attend.  It was practiced that the groom's parents pay for this dinner.

A bridal luncheon may be hosted for the bride's attendants during the wedding day.  However, time constraints may not permit this to be part of the schedule for the wedding day.  Likewise, the groom may also host a groom's dinner for his groomsmen.

Interestingly, even if the couple is not very religious, they still prefer a religious ceremony.  However, this may pose a problem since in America people of different faiths and religious backgrounds get married.

Even if there are few people who believe in bad luck, some couples still make sure that the groom does not see his bride until she starts waking on the aisle.

It is still practiced that the groom and his groomsmen enter the church through a side door.  The bride will then walk down the aisle with her father.  In some cases when both her father and stepfather brought up the bride, she may ask them both to escort her.

During a formal reception, there is usually a bridal table where the couple and the attendants sit.  Also, food and drinks should be served as the guests appear at the reception.

Before, gift giving used to depend on what the guest will feel useful for the couple.  Now, it is better to register for gifts so the guests will know what to bring that the couple will need.

Upon receiving an engagement or wedding gift, it is better to send a thank you note apart from saying "thank you" to the giver.  This should be sent within two weeks upon receipt of the gift.  Make a personalized thank you note, instead of using an impersonal generic thank you note.

These are just some American practices during weddings. Whether one chooses to this or prefers to have a very different wedding, what's more important is that American's still believe in the wedding vow, "For better or worse, 'til death do us part."

Wednesday, April 30, 2014

It's a tradition for the newly married couple to leave the reception early and have a grand exit. If they'll be driving their own car, one fun thing to do is secretly decorate their car so that when they go to leave it is covered with loving messages that identify them as a newlywed couple. It will put a smile on your newly married friend or family member's face.

Instructions

    1 Write on the windshield and windows with a bottle of white shoe polish, preferably one with a nice tip like a marker. Write messages such as "Just married," "Newlyweds," "Ball and Chain" or the date of the wedding.
    2 Clean out some empty cans like those that hold canned vegetables. Drill one hold near the top in each can. Cut one 2-foot long piece of ribbon for each can. Thread a piece of ribbon through the hole and tie a triple knot. Repeat for all the cans. Four or five cans is best. Tie the other end of the each ribbon onto the rear bumper of the car. If you can't tie it onto the bumper then tie all the ends of the ribbons together in a single large double knot. Take a piece of mounting tape and peel off one side of the protective covering. Stick it onto the bumper and press down to secure. Peel off the other side and stick the ribbon clump knot to the adhesive. Hold down for several seconds to ensure it sticks. A good mounting adhesive will be able to hold the weight of the cans and withstand the motion of them bouncing on the street.
    3 Cut 20 2-foot long pieces of white streamers. Take five and hold them all together in a bunch. Take one end and tie it in a knot around a car handle. Repeat with all of the handles.
    4 Hang a wedding flag from the antenna. It may clip on or it might slide over the antenna through a small vertical hole in the fabric.
    5 Inside the car sprinkle flower petals and spray a romantic body spray.

    Sunday, April 27, 2014


    Car decorations are a traditional way to mark the car of a newlywed couple. Members of the wedding party or other close friends usually decorate the wedding car with ribbons, empty tin cans and writing to announce the wedding for all to see. Attaching ribbon to the car takes just a few minutes. Once the ribbon is in place, it will remain intact until it is removed.

    Instructions

      1 Unravel the ribbon if it is spun on a spool. Straighten the ribbon so it lays flat. You may need to set books on the ribbon overnight to flatten it.
      2 Open the driver and passenger side doors. Pass the ribbon through either side and out toward the front of the car. Close both doors.
      3 Pull the ribbon across the front hood. Thread both ends of the ribbon through the front hood ornament or car mascot, if applicable. If your car does not have a hood ornament, just pull the ribbon across the front hood to the front bumper.
      4 Tie a bow in the same way that you would tie a pair of shoe laces. Keep the ribbon snug as you pull both sides into a bow. Make sure the ribbon does not cover the front license plate. It will rest on the front bumper.
      5 Secure the ribbon running across the hood of the car and the bow resting on the bumper using adhesive pads from a car wedding ribbon kit. These adhesive pads are specially designed to temporarily bond to the hood of your car without causing damage.
      6 Reach under the ribbon and set each pad in place. Sweep your hand over the ribbon and gently press down to fasten the ribbon to the pad. Continue along the hood and down the front bumper; add enough pads to secure the bow.

      Wednesday, April 23, 2014


      How to Correctly Address Wedding Invitation Envelopes

      The etiquette of addressing formal invitation envelopes can leave you scratching your head. When you're inviting a single mom or a family where not everyone has the same last name, the formal address gets tricky. Don't fret about making an etiquette faux pas. Just educate yourself on the proper titles, and your wedding invitations will make the invitee smile.

      Instructions

        1 Address an invitation to a a female guest that is single and not married, with Ms. in front of her first and last name. For example, "Ms. Sally Brown."
        2 Use Mrs. in front of the guest's first and last name if it is a female guest who is divorced but still uses her married name. For example, "Mrs. Sally Rose." You can also use Ms. in this instance. Use whichever courtesy title you think the recipient would prefer.
        3 Address an envelope to a female guest that is divorced and now uses her maiden name, with the same address you would use for a single female, for example, "Ms. Sally Brown."
        4 Use Mr. in front of an unmarried male guest's first and last name. For example, "Mr. Bobby Rose."
        5 Address the envelope of the invitation to a married couple using the same last name with "Mr. and Mrs." in front of the first and last name of the husband. For example, "Mr. and Mrs. Bobby Rose."
        6 For a married couple where the wife kept her maiden name, you would address it as "Mrs. Sally Brown & Mr. Bobby Rose."
        7 Send an invitation to an an unmarried couple that does not live with each other only to the more intimate friend. Address her as a single female, "Ms. Sally Brown."
        8 Inviting an unmarried couple that lives with each other, means you address the invitation to both as single people, but you would do so alphabetically by last name. So, in the case of Sally and Bobby, it would be "Ms. Sally Brown & Mr. Bobby Rose."
        9 If you have a same gender couple, address them alphabetically by their last names. For example, "Ms. Sally Brown & Ms. Susan Smith."
        10 Do not include children under 18 on the outside envelope. Children over the age of 18 should be sent their own wedding invitation, even if you are already sending one to their parents and they live at home with them.

        Monday, April 21, 2014

        Wedding planning is one of the most exciting times in a persons life--and one of the most hectic. If you are planning to invite guests to your engagement party, bridal shower or wedding, your guests will want to know where you are registered so they can purchase gifts for the occasion. This is where a wedding registry comes into play. Registries can be set up at nearly any retail location. A good rule of thumb for any engaged couple is to register at 3 to 6 retail locations. The stores should range from low to high end to accommodate each guest's gift purchasing ability.

        A great mid-range store is Target. Target stores carry a large inventory of reasonably priced home goods and have many locations throughout the United States. Target even allows you to create a registry online for added convenience.

        Instructions

          1 Compile a list of items that you need or want. Wedding registries typically consist of household items such as bed linens, bath towels, kitchen utensils, furniture, and other household goods or decorations. If you cannot come up with a list off the top of your head, you can go to a Target store or to their website and browse items that are available.
          2 Choose your method of registry. Your registry can be set up at a Target store or online at their website. If you decide to start your registry in a physical store, you can always add items to your registry list online and vice versa.
          3 To set up your registry in a physical store, locate a Target near you. When you enter the store, go to the customer service counter located at the front of the store and explain that you would like to set up a wedding registry. The customer service representative will ask you a few questions such as your name and contact information. You will then be given a scan gun to be used for adding items to your registry. When you find an item that you would like to add to your list, point the scan gun at the bar code on the item. The scanner should make a beeping sound to indicate that the item has been added to your registry list. When you have finished adding items to your list, return the scan gun to the customer service desk and receive a print out of your list.
          4 To set up your registry online, go to www.Target.com. At the top of the page you will see a link for "Gift Registries + Lists." Click on this link and it will give you the option to set up your wedding registry through an application called "Club Wedd." You will need to create an account by filing in your name, contact information and creating a user name and password for the account. After your account is enabled you will be allowed to add items to your registry by clicking the "add item to registry" option next to each item in Target's online inventory. Once an item is added to your registry it will be available for your guests to purchase online or by requesting a copy of your registry at any Target store nationwide.

        Saturday, April 19, 2014

        For atheist couples, a wedding doesn't have to end with a visit to the local courthouse. Just because you don't want God involved in your union, doesn't mean that you can't celebrate your wedding in front of your family and friends. There are many options open to couples who wish to hold a non-religious wedding ceremony.

        Instructions

          1 Select an officiant of your ceremony. An officiant can be a judge, lawyer, Justice of the Peace, or even a non-denominational minister that will promise to keep God out of the ceremony.
          2 Decide where you would like to hold your wedding ceremony. There are many options available that don't include the tradition church or chapel. Hold your ceremony on the beach, in your back yard or in a community center. The sky is the limit when it comes to location.
          3 Focus the wedding's theme around your personal views, instead of a set philosophy or institution. An atheist wedding ceremony should demonstrate the hopes, goals, aspirations and dreams of the bride and groom, taking into account the uniqueness of their relationship.
          4 Choose the "Gathering Words" of your ceremony. Many traditional, Christian weddings begin with the words, "We are gathered together under God," however the atheist option could be something like, "We are gathered together in love," or the like. The opening words can be a statement, or something more personal and unique, like a poem or song.
          5 Write your wedding vows. Regardless of what you decide to add to or eliminate from your wedding ceremony, it is important that you include vows, because without them, the marriage is not legal. You can keep your vows as simple as the traditional "I do's," or write your own, personal declarations for one another.
          6 Exchange a symbol of your new, legal relationship. Many atheists choose to eliminate the traditional exchange of rings, however you might consider other symbols of your love, such as bracelets, charms, or necklaces. If you choose not to exchange gifts, you might consider the symbolic tying of the wrists, which represents the union, drink wine from the same bottle, or simply light a candle together.
          7 End your atheist wedding ceremony with an acknowledgment of the union. These words do not need to be the traditional, "I now pronounce you man and wife," but may be anything that your imagination can dream up.

        Tuesday, April 15, 2014

        Once the bride and groom have said "I do," wedding guests look forward to an evening of food and drink. Calculating the amount of alcohol needed to ensure a sufficient supply throughout the reception is a challenging proposition. Purchasing too much can put a big dent in the budget, but running out during the festivities may make you look cheap.

        Instructions

        Finalize the Reception Logistics

          1 Determine the number of people expected to attend the wedding reception before embarking on any calculations. Include the bridal party in the final count, but omit any wedding guests under the age of 21, the legal drinking age in the United States, and any guests who you know do not drink alcohol.
          2 Assess the overall demographics of the attendees. In a demographically diverse group, expect roughly 50% beer consumers, 30% wine drinkers and 20% who prefer cocktails. If your guests are predominantly young men, expect a higher beer consumption. A predominantly female audience may consume more wine and wine coolers.
          3 Finalize the wedding reception itinerary, particularly the duration of pre-dinner cocktails and post-dinner dancing, and list the type of drinks you will serve during each portion of the reception. Some people prefer an open bar serving beer, wine and spirits throughout the entire reception, while others may choose to limit the types of drinks served. It is acceptable to limit pre-dinner cocktails to wine, champagne, punch or a special signature drink chosen by the bride and groom. While this may not change the amount of alcohol you must buy, it is crucial in determining how much of each type of beverage you must purchase. It is very common to serve only wine and champagne during the meal, with a full bar open for the post-dinner festivities.

        Determine Specific Beverage Needs

          4 Estimate roughly one drink per person for each hour that you plan on serving drinks at the reception. If you expect your wedding reception to last for four hours and you have invited 100 guests, estimate a total of 400 drinks.
          5 Use the ratio of beer, wine and spirits that you determined while reviewing the guest list to calculate the amount of each type of beverage. If you expect your guests to consume 400 drinks at the wedding reception in total, that translates to 200 beers, 120 glasses of wine and 80 cocktails using the standard 50/30/20 ratio.
          6 Calculate necessary champagne for toasting separately, using one 4 oz. glass per person. Many of the guests who are otherwise beer, wine or cocktail drinkers will sip the champagne during the toast to be polite, but will probably not consume the entire glass.

        Calculate Total Alcohol Needed

          7 Use standard per-drink consumption measures to determine the amount of alcohol you will need for your reception: 1 to 2 oz. of alcohol for each cocktail, 4 oz. for each glass of wine and 8 to 12 oz. for each beer, depending on the size of the glass, bottle or can.
          8 Calculate beer needs based on whether you want to serve beer on tap or in bottles or cans. For a total of 200 servings of beer, purchase a half keg for beer on tap or 33 cases of 12-pack bottles or cans.
          9 Calculate wine based on one 750 ml bottle providing roughly five glasses of wine. For 120 glasses of wine, purchase 24 bottles, which is the equivalent of two cases.
          10 Calculate spirits based on 1.5 oz. per drink to ensure a sufficient supply. Although a standard cocktail contains 1 oz. of alcohol, spillage and incorrect measurements may happen unless you have professionals tending bar. Since a standard 750 ml bottle will make 18 cocktails, you will need the equivalent of 4.5 bottles of liquor.
          11 Calculate champagne based on six glasses per bottle. For 100 flutes of champagne, purchase 17 750 ml bottles.

          Thursday, April 10, 2014


          How to Perform a Wedding as a Notary

          For a notary public, being asked to officiate at a wedding ceremony is a great honor and responsibility. Only three states currently allow notaries to officiate at wedding ceremonies. If you're a notary from Florida, Maine or South Carolina, you're legally qualified to solemnize a marriage. Even if this is your first time performing a wedding ceremony, you can help create a perfect wedding day by planning ahead, educating yourself and consulting with the couple.

          Instructions

            1 Consult with the couple. Make sure that all legal requirements are met. The couple needs to obtain a marriage license and present you with the completed forms before the ceremony. Check that the license is valid and that both partners have identification. Talk with the couple and ascertain any personalized goals for the wedding ceremony. If the couple write their own vows, you might want to read the vows beforehand.
            2 Practice your role beforehand. You should finalize your speaking parts and have a hard copy available. You don't need to memorize your part of the ceremony but practice until you feel confident. Even if the ceremony is small, meet with the couple before the ceremony and practice the entire ceremony once or twice. This will ensure a smoother process on the actual day.
            3 Open the ceremony with an introduction. During the wedding ceremony, it's standard to open with the phrase: Dearly beloved, we are gathered here today to join this man and this woman in matrimony." Make adjustments according to the individual ceremony. If it's a very small or nonreligious ceremony, this opening may be unsuitable.
            4 Guide the couple in exchanging vows and rings. You can use a standard script or personalized vows. The vows must reflect the legal commitment that the couple is making. Ask the bride and groom individually if they agree to the responsibilities and obligations of marriage. After each one answers "I do," the couple can recite more personal vows directly to each other. Ask the couple to place the wedding rings on each other's fingers.
            5 Pronounce the couple married. You might say: By virtue of the authority vested in me under the laws of the state of Florida (or Maine or South Carolina), I now pronounce you husband and wife." Alter this according to the individual ceremony.
            6 File the marriage certificate. After the wedding, submit the certificate to the town clerk. Typically you have seven to 15 days. You should sign the certificate as the officiant and include all required information. The certificate should be signed in front of two witnesses. As a notary, you do not officially count as a witness.
            7 Record the marriage. As a notary, you are required to keep a record of all wedding ceremonies you perform. Include the date, names of the bride and groom and the location of the ceremony.

          Sunday, April 6, 2014


          How Does a Wedding Registry Work?

          Choosing a Registry

            Gift giving has long been a wedding tradition and serves to extend goodwill to the newly married couple. Wedding registries exist to simplify a couple's wish list and to make shopping more convenient for wedding guests. The risk of receiving unwanted or duplicate gifts is greatly reduced when wedding registries are properly used. Several factors, including a couple's collective style and family budget, help determine which store selection is most appropriate. For example, while some couples lean towards formal, expensive merchandise, others opt for casual, inexpensive pieces. Couples may survey stores in-person, online and though catalogs to pinpoint suitable options. Couples pay special attention to registry incentives such as gifts and product coupons. A couple may choose several registries to accommodate friends and family members in different physical locations or financial situations. Online registries are becoming an increasingly popular option.

          Making Selections

            Prospective couples establish accounts with chosen wedding registries. Although the process can vary between wedding registries, certain aspects remain consistent. Couples scour a chosen store's offerings to find items that they would like to receive as gifts. The couple then adds each item to a "wish list," with the hopes of receiving them as wedding presents. Couples choose items in many ways, including accompanied store walk-thrus, catalog viewing and online options. Although couples have the option of submitting a completed list within minutes of account setup, the ability to edit selections is usually extended. Couples add, replace and delete items to build the list that best fits their collective vision.

          Purchasing Gifts

            The wedding couple informs guests of the registry details. This is done with either a formal or an informal approach. For example, some couples give guests official registry cards complete with store locations, while others simply let guests know by email or even word-of-mouth communication. The guests then attempt to fulfill the couple's wishes by visiting the gift registry. Guests may also decide whether to complete gift buying in person or online. Guests use the couple's last name to access the official wedding registry list. If a guest chooses to shop online, he accesses the correct registry list by choosing the couple's last name. During an in-person store visit, the wedding guest can ask for associate assistance or complete the registry look-up at computerized registry stations. The wedding registry list provides a summary of activity, including whether an item has been purchased.

          Thursday, April 3, 2014


          How to Pin a Wedding Dress Train

          Brides often pin or bustle the train of their wedding dress after the ceremony and before the reception begins. Typically, a bride pins up the train on the dress to make it easier to walk and dance throughout the reception. The most common way to bustle the dress is in an overbustle, which pulls the train up and pins it to a higher point on the dress.

          Instructions

            1 Hang your wedding dress on the hangar. Spread the train out to resemble how it will look when you are wearing it.
            2 Identify the center point of the train from left to right and the center point from top to bottom.
            3 Push a straight pin through the center point of the train and pick the train up, bringing it to the waist area of the dress. Pin the train to the dress to see how it looks. If the waist area is too high, unpin the dress from the waist and try pinning it to another point on the dress, such as the point where the dress of the skirt ends and the train begins. Since each dress and train are different, continue to move the train around until it is in a position that looks how you want it to look on the day of your wedding.
            4 Sew the eye part of the hook on the part of the dress you want to hook the train, and also sew the hook on the train. For longer or fuller trains, you should and may need to attach more than one eye and hook. If this is the case, sew one on each side of the center part of the train, approximately 1 inch apart from each other.

          Tuesday, April 1, 2014


          How to Word Wedding Invitations for Money Gifts

          Traditionally, wedding gifts are given to a couple so that they can set up their new home together and prepare to raise a family. In modern times, however, many couples are older when they get married and do not need household items, while others pay for their own wedding and would prefer financial help over physical gifts. If you would prefer your guests to give cash as a wedding gift, you must go about making that request very carefully.

          No Wording is the Best Wording

            Many etiquette experts advise couples not to mention gifts or gift registries at all on their wedding invitations. This includes traditional gift registries as well as requests for monetary gifts. If you refrain from mentioning gifts on your invitation, be sure to tell your parents, your bridal party and other people that are very close to you that you would prefer money to physical gifts. Your guests will likely ask one of these people what you would like as a wedding gift and will be told of your preference.

          Presentation Preferred

            If you want to buck tradition and simply state that you would like monetary gifts on your invitation, add the phrase "presentation preferred." This is a polite way of saying "we'd prefer cash as gifts." Alternately, you could add something like "In lieu of gifts, the bride and groom would appreciate donations towards their honeymoon," or something similar. This kind of phrasing is not appropriate for an overly formal invitation, but will work on a more casual style of invitation.

          Use Your Wedding Website

            If you want to directly ask for money as gifts, you do not have to do so on the formal wedding invitation. Many couples now set up wedding websites that include details like directions to the wedding website and meal options that don't fit on the paper invitations. You can include a section on your wedding website explaining that you would prefer cash gifts. Simply include the URL of your site at the bottom of your paper invitation to direct guests to the website.

          Register for Money

            There are online services that allow couples to set up a registry to help them pay for portions of their honeymoon, a down payment on a home or just straight-up cash. This way guests don't have to hand you a check at the wedding, but can simply contribute to a lump sum. Again, it is considered gauche to mention the registry directly on your invitation, so either let those close to you spread the word or list the registry information on your wedding website.

          Saturday, March 29, 2014

          Hindu weddings are steeped in important rituals and customs. Some couples choose to have the typical Hindu ceremony that spans several days, while others have a condensed version that lasts only a few hours.

          Instructions

            1 Arrange the proposal so that the whole family feels included in the event. In this way, you will receive approval from elders, and the family will also be able to determine whether they think you and your partner are compatible for marriage.
            2 Check with an astrologer to match your horoscopes and determine an auspicious date and location for the wedding. Many Hindu ceremonies take place at the bride's house or at a hall.
            3 Decide if you will have guests sit on the floor, as is typical at Hindu weddings, or whether you would prefer to go the more modern route and provide chairs.
            4 Include the 15 rituals that traditionally make up a Hindu wedding ceremony. Or, if you prefer, select only those that have special meaning for you as a couple.
            5 Provide a sari bought by the groom for the bride to change into during the ceremony. (The outfit she arrives in will typically be bought by her parents.) The change of clothes is very meaningful, since it signifies the shift of responsibility from the parents to the husband.
            6 Offer food and alternate entertainment to occupy the guests during the wedding ceremony. (Eating, drinking and talking during the ceremonial events is accepted practice at Hindu weddings.)
            7 Order garlands of flowers that the bride and groom will exchange during the ceremony, often along with rings, to symbolize acceptance and welcome.
            8 Bring a gold necklace if you would like to include the "tying the knot" ritual, in which the groom ties the necklace around the bride's neck.
            9 Include a portion of the ceremony (known as the saptapadi portion in Hindi) in which the bride and groom take seven steps together toward a long and happy marriage, praying for blessings such as wealth, happiness, strength and devotion with each step.
            10 Prepare a mixture of honey and yogurt, which the bride offers the groom to ensure his good health and a sweet start for their marriage.
            11 Offer food to the gods during the ceremony to obtain their blessings. (In the Hindu religion, there is one supreme being, with all other gods being aspects of this one.)
            12 Provide a stone for the bride to stand on to signify her faithfulness and loyalty to the marriage.
            13 Ask the groom's brother to sprinkle puffed rice for prosperity and flower petals on the couple after they exchange vows, following an ongoing Indian tradition.
            14 Create a marriage mark on the bride's forehead with sedhu, or orange powder, to announce to the world that she is now married. After the mark is applied, the couple should touch each parent's feet and receive their parents' blessings.
            15 Prepare a large feast to serve the guests following the ceremony. Expect family and friends to help make the food.

          Wednesday, March 26, 2014

          You've imagined the picture-perfect wedding your entire life and now is the time to make those dreams come true. Your wedding day should be the beautiful occasion of your dreams, and having your reception at home is one way to make your event intimate and deeply personal. Create a fairytale ending to your perfect day by using these tips for a reception at home.

          Instructions

          Dcor

            1 Keep the dcor simple. Use only white linens with accent pieces in varying shades of your wedding color(s). Since a home is a comparatively small venue, you don't want to overwhelm it with too much color or gaudy decorations.
            2 Use flowers as an elegant means of decorating. Consider renting pillars to set within the doorway or by the cake table, and top them with large urns overflowing with beautiful bouquets. Use a simplified version of the urn bouquets as centerpieces for the tables.
            3 Bathe your home in yards of silk fabric in your color scheme. Drape it from doorways, hang it from the mantle, or use it to cover any unsightly areas of the home. Arrange it elegantly, being liberal with the fabric without overdoing it.
            4 Set arrangements of candles around the house. Use different shapes and sizes, all in white or in varying shades of your wedding color(s). They needn't be lit if you don't want to worry about a fire hazard.

          Food and Seating

            5 Decide what kind of food you will be serving, whether simple finger foods or a full-blown meal. Select foods that will be good served at room temperature and that can be made in advance, if you are doing the cooking yourself.
            6 Select a convenient place to set up a table for the food so that guests can serve themselves. Choose a spot that is not in a highly trafficked area.
            7 Look for eclectic pieces of china and crystal to use as serving dishes for the food. Raid your dish collection, as well as that of your mother and grandmother (and anyone else willing), or hunt through garage sale offerings to find enough dishes in your color scheme.
            8 Serve the wedding cake on a small table covered with a beautiful floor-length white cloth and handfuls of rose petals. Use a similar cloth for the food table, but decorate it using layered fabrics as a kind of table runner, rather than covering it with petals.
            9 Cover chairs with crisp white chair covers and tie a wide ribbon bow-in your designated colors, of course-around each one. Specialize the bride and groom's chairs by sticking a bunch of flowers under the ribbon.
            10 Opt for long tables, if space allows it, for a family-style feel. Otherwise use small tables carefully dispersed. Whatever your table size, though, cover them with white tablecloths and place a table runner down the center to match the bows on the chairs.
            11 Place tiki torches or freestanding candle globes around the perimeter of your seating and dancing area if the party is outdoors and will continue into the night.

          Home Reception Etiquette

            12 Stand at the door with your new spouse to greet guests as they enter the house. Make sure to mingle throughout the crowd during the reception.
            13 Assess the state of your bathrooms. Place decorative soaps out and make fresh hand towels available. Set a lovely flower arrangement on the countertop as well.
            14 Clean your house thoroughly and make landscaping attractive. This may require hiring people to get the job done, but it's worth it.
            15 Look for any potential danger spots inside your home and out where people could trip, fall or otherwise injure themselves. Take care of these places to the greatest extent possible.
            16 Alert your neighbors to the fact that you will be holding this event at your home and ask their permission to park cars in front of their houses. Make sure that there will be sufficient parking for the occasion.
            17 Create a contingency plan in the event of inclement weather. For an outdoor reception, you must have a Plan B.

          Monday, March 24, 2014

          JET Magazine, known online as EbonyJet.com, is an online daily magazine that seeks to create an online platform for exploring issues that impact African-Americans, as well as how African-Americans impact the world. JET Magazine is also available in print form on a weekly basis, publishing articles that range from celebrity profiles to style and living to profiles of real people and their weddings. JET Magazine features weddings in its "Love and Happiness" section each week.

          Instructions

            1 Gather all of the information needed to submit a wedding to JET Magazine, type up the information on one, easy-to-read piece of paper. You will need to send: A clear, full-color photo of the bride and groom that shows their faces entirely; the full names, address and phone number of the bride and groom; the location of the honeymoon; the education and occupation details for the bride and groom; the location of the wedding, including the city and state in which couple married; any details on where the couple plans to reside permanently.
            2 Write the name of the bride and groom, their phone number, and address on the back of a clear, full-color photo. JET Magazine does not accept black and white wedding photos.
            3 Send the information and the full-color photo to JET Love & Happiness, 820 S. Michigan Avenue, Chicago, IL 60605. Once received, and editorial panel will review every wedding for consideration, then select weddings that will appear in JET Magazine.

            Wednesday, March 19, 2014

            It is your wedding day and even though the ceremony went off without a hitch, the reception is another matter. Will everybody get enough to eat? Will some people have too much to drink? Will the carved ice sculpture melt? Should we have a dollar dance? If you are considering the dollar dance, don't worry. It is a tradition that is known across the country and is a wonderful way to spend a few moments with your guests. Read on to learn how to have a dollar dance at your wedding.

            Instructions

              1 Discuss with your future spouse if he or she would like the dollar dance at the wedding reception. If either of you are opposed, forgo the dance. Communication is key. Since you are both dancing with family and friends during the dance, no one should be forced to comply if they are not comfortable.
              2 Inform your DJ that you would like to have a dollar dance. He is probably very familiar with the tradition and can help guide you. Take his advice on when to announce the dollar dance. It should probably be after the bouquet and garter toss but it shouldn't be saved for the very end of the reception, when most people have already left.
              3 Choose the music you would like played during the dance. Any songs with "Friend" in the title are a good idea. Examples could be "That's What Friends are For," "You've got a Friend in Me" and the theme song from the TV show "Friends." Avoid any songs with romantic overtures.
              4 Have the DJ announce that it is time for the dollar dance and have participants line up behind the maid of honor and best man, who act as gatekeepers. Guests voluntarily line up to dance with either the bride or groom and pay for the privilege with a $1 bill--or a larger denomination, if they so choose.
              5 Rotate the dancers in and out every 30 seconds or so, having the gatekeepers monitor the flow. This gives the bride and groom a few moments with many of their guests and a moment to connect, while keeping the event moving. Anyone can be polite and conversational for half a minute and the pressure is off the happy couple to end the dance since the maid of honor and best man are sending new partners in every so often.
              6 Make conversation by asking your dance partner if they enjoyed the cake or have had a good time. Tell them it was wonderful to see them and accept any compliments graciously. Before you know it, your next dance partner will be tapping on his shoulder.
              7 Wind up the event as the line dwindles. Have the DJ announce that it is "last call" to dance with the happy couple. Let the bride and groom dance together and then move onto a more upbeat song to restart the party.
              8 Set the money aside and take it with you when you leave the reception or have it delivered along with your gifts.

            Tuesday, March 18, 2014

            For most brides, the wedding dress is a treasured heirloom to be saved and passed on to future generations. For others, it's simply an expensive dress that the bride wore once. Whether the marriage didn't work out, the dress wasn't the one that the bride actually wore or the bride just wants to recoup some of her investment, reselling the dress is the next step.

            Instructions

              1 Clean the dress thoroughly. A clean dress could be the deciding factor on whether a resale customer buys your dress or not. Pay special attention to any stains around the hem of the dress and the train where it may have touched the ground. Many dry cleaners specialize in cleaning wedding dresses.
              2 Let your fingers do the walking. Local consignment stores are a good place to resell wedding dresses. However, some of them have rules on conditions under which they will take consignment clothing. A quick phone call should help you determine what time of year the shop takes wedding dresses and how much of a percentage of the sale that they may want to keep.
              3 Consider online resale. Websites such as eBay, craigslist or PreOwnedWeddingDresses.com are good places to sell used wedding dresses. Use a digital camera to photograph your dress, making up-close photos of any dress damage so that the potential brides can look over your gown.
              4 Try the classifieds. Your local newspaper is a good source for local brides who may be interested in purchasing a dress without paying shipping. You may also check with your local wedding planners, photographers or other vendors about posting fliers at their places of business.

            Sunday, March 16, 2014

            Wedding response cards let the bride and groom know not only how many guests will attend their wedding, but also the exact names of the guests attending, and their requested meal choices, if that is an option. It is important to send an R.S.V.P card back to the bride and groom as soon as possible, and always before the requested due date, because the couple must submit headcounts to their vendors to ensure the right amount of food and drink, favors and chairs are ordered.

            Instructions

              1 Understand who exactly is invited to the wedding by looking at the names on the inner envelope. If children are invited to the reception, their names should be listed on the inner envelope. When in doubt, it's best to talk to the mother of the bride or a bridal party member. You do not want to R.S.V.P. for guests who were not intended to be invited.
              2 Fill out the names of the guests who will be attending using a salutation and first and last names on the line that starts with "M," "Guests" or "Names." The "M" is the start of "Mr." or "Ms." For example, you might continue the "M" line with "Mr. and Mrs. John Smith" or "Ms. Jane Doe."
              3 Mark an "X" next to the appropriate line indicating whether you accept or decline the invitation.
              4 Choose a dinner entre by writing the number requested next to the meal choice. If one person wants fish and one person wants chicken, the numeral "1" should be written next to both options.
              5 Indicate the number of guests attending by filling in the numeral of guests next to "Number of Persons" or "Number of Guests."

            Thursday, March 13, 2014


            How to Put Wedding Invitations in Envelopes

            Not every engaged couple is interested in following the traditional, formal rules of wedding etiquette. However, those who are want to be certain they are doing things correctly. It might seem that putting wedding invitations together would be a simple task, but when an invitation includes response cards, maps and other information, it can get confusing. Fortunately, it is possible to do this task correctly by following a few guidelines.

            Instructions

              1 Lay the inner envelope, the envelope that directly holds the invitation, in front of you with the invitees' names facing down and the open flap pointing to the right.
              2 Slide the invitation into the envelope. The front of the invitation should face the back of the envelope so it is seen when the envelope is opened.
              3 Place the mailing envelope so you are looking at its back and the open flap is pointing to the right.
              4 Holding the invitation, cover the names of the invitees with protective tissue paper, if it has been provided. Tissue paper is not required.
              5 Place the invitation into the mailing envelope with the front of the invitation's envelope facing the back of the mailing envelope.
              6 Place other enclosures, such as response cards, on top of the invitation, according to size with the largest enclosure first. Stack each envelope facing the same way as the invitation. Seal the mailing envelope.

            Wednesday, March 12, 2014


            How to Block Hotel Rooms for a Wedding

            You have reserved the venue, caterer, florist and officiant, and your wedding to do list seems complete. But when planning a wedding, you cannot neglect your duties as host or hostess. Part of this is making sure your guests have somewhere to stay. Fortunately, reserving a block of rooms at an area hotel can take as little as 10 minutes.

            Instructions

              1 Call or use the internet to find out rates at area hotels. Narrow down your search by selecting hotels near your wedding or reception venue. Make sure to inform the reservation agent that you are inquiring about booking several rooms and want to know about discount rates for large reservations.
              2 Select a hotel or hotels with the best rates. Choose at least two hotels in different price ranges to accommodate guests with higher and lower travel budgets.
              3 Call the selected hotels once again and inquire about the rates for a large booking. Do not quote the rate you were originally given; instead allow the reservation agent to provide you with another rate quote. If the second rate is higher than the first, inform the agent of the rate you were given during the previous call. Most hotels will honor this original rate, particularly for a large block of reservations.
              4 Inform the agent that you want to block off rooms for your wedding guests. Inquire as to the rules and restrictions for reserving room blocks, including cancellation requirements and fees, deposits and occupancy level requirements. Do not use the hotel if the fees are excessive or terms are unreasonable.
              5 Consider the make-up of your wedding party when blocking rooms. If several of your guests have children, make sure to book rooms with double beds as well as king or queen bed rooms.
              6 Reserve the rooms for at least one day before the start of your wedding events and one day after the last event. For example, if you are planning a rehearsal dinner on Friday and a post-ceremony brunch on Sunday, reserve your room block for Thursday through Monday. This ensures the hotel will have rooms available for your guests. Guests can change the dates to fit individual travel arrangements upon making the actual reservation.
              7 Provide a credit card to guarantee your reservation if required by your chosen hotel. Make sure to find out when you must release any unreserved rooms in order to avoid charges to your credit card.

            Monday, March 10, 2014

            If you or your fianc do not wish to have a long engagement, don't worry, there are ways to plan a wedding in 6 months or less. It will take a lot of organization and attention to detail, as well as some amount of compromise, but it can be done. Just be prepared to be flexible and start ahead of time so you are not rushed at the last minute.

            Instructions

            6 Months and Counting

              1 Get a planner. An actual person who plans weddings or a day planner will work fine. Doing the work yourself without a hired wedding planner might save money, but it will also add to the stress of doing everything in just 6 months. If you do hire a wedding planner, most of these instructions will just require a final okay from the happy couple!
              2 Pick a date. Although this is the most important day of your life, be flexible. Some venues might have the week before or the week after available, but nothing open on the day you have chosen, so be prepared to bend for the sake of planning.
              3 Find and book a venue for the wedding and reception. Some churches prefer a 9 month waiting period, but others will bend their rules. Another option is having the ceremony at the same location as the reception. This should be done immediately after you choose the wedding day.
              4 Ask if the reception venue provides flowers or caters the food and wedding cake. If they do, begin to make your selections. Flowers should be based on the season of the wedding day. If they do not provide these services, find out if they work with preferred vendors for any of those items.
              5 Attend a bridal show, if possible. There are samples from caterers, bakers, photographers, make up artists, dress stores, tuxedo shops and much more. It will help narrow down decisions and you can possibly book some vendors.
              6 Buy a dress. While you are at it, purchase the shoes, veil, jewelry or any hair pieces a the same time. Do this soon after becoming engaged and finding a reception venue because most special order dresses take 6 weeks to 3 months for you to get back and most will require some sort of alterations. Ask about a preferred seamstress at the dress shop.
              7 Choose the friends or family members you would like to be attendants for your special day. Generally, they will offer any amount of help if asked, so don't forget to delegate throughout the planning process. 6 months will begin to sail by!

            Working With Vendors

              8 Contact a caterer and go over wants and dislikes. Hire them when you find one you like. You will need to decide on the menu about three to four months before you get married so start looking once you decide on the venue.
              9 Find a cake design that you like. Hire a baker when you find one you like. Many bakeries will have portfolios to view. This also needs to be done about three to four months before you get married.
              10 Choose a florist. Meet with and discuss likes and dislikes for bouquets and centerpieces. You will need to make final floral decisions about 3 months before you get married so hire them once a venue is chosen.
              11 Decide on a DJ or a band. Make reservations for your wedding day. You should do this as soon as possible after choosing the wedding day. Many DJ's get booked up very quickly!
              12 Choose a photographer and book them for your wedding day during the first month of planning. Ask to see some of their work as well to get an idea of who you are hiring. Decide if you want to hire a videographer to record your wedding as well.
              13 Find a hairdresser and a makeup artist. Make an appointment for your wedding day. You will need to practice your look with your tiara and veil a month or two before the actual wedding.

            Getting Dressed for the Event

              14 Decide on bridesmaids and flower girl dresses. Their dresses can take several weeks to be delivered as well so do this shortly after purchasing the bridal gown.
              15 Shop for the groom and his attendants. This includes his tux and his ring. This should be done with four to five months of planning left.
              16 Purchase any gifts for the attendants and for those that helped in any way. You will need to find time to shop with about 2 months to spare in planning.
              17 Contact the seamstress to make any alterations needed to your dress and your bridesmaid's dresses once they are delivered.

            You're in the Home Stretch

              18 Hire a reliable travel agent to make reservations for a wonderful honeymoon! Your reservations should be complete with four months of planning left!
              19 Create an invitation. Ask parents for relatives names and addresses. Do this on an ongoing basis after the reception venue is confirmed. You will need to have a final invite list before you order your invitations.
              20 Order invitations. Don't forget to add in directions or maps. Printing usually takes three weeks, and they will need to be sent eight weeks ahead of time, so make sure they are ordered with four months of planning left.
              21 Block hotel rooms for out of town guests. Most hotels will offer special rates for wedding parties. Do this when ordering the invitations. You will be able to have an idea of how many rooms you will need.
              22 Make reservations for the rehearsal dinner or any luncheons you might be hosting. Try doing this with about three months to spare, if not sooner.
              23 Get the necessary blood tests and marriage license for your state. Most licenses will only be valid for one month so this should be done with three to four weeks of planning left.
              24 Tie up any other loose ends still lingering with about one month to spare. The majority of the real planning is out of the way, but minor decisions might need to be made.

            Wednesday, March 5, 2014


            How to Sell Gold Wedding Rings

            Whether it be a reminder of relationship gone wrong, an heirloom collecting dust or a time of financial hardship, it may be possible to sell that gold wedding ring. Before you begin, however, it's important to do your homework. Doing so will increase your chances of a profitable transaction.

            Instructions

            How to Sell Gold Wedding Rings

              1 Take your ring to a qualified and credentialed appraiser. He can give you a good estimate as to the worth of your gold ring. Once you receive the appraisal, read it carefully and be sure to educate yourself about anything that seems unclear.
              2 Be certain you can part with the ring. You will not be able to get it back once the deal is made.
              3 Take the piece to a professional buyer (a jeweler, for instance) and get a quote. In some cases, she will want to test the metal. It's important that you don't let her do anything destructive to the ring before she has agreed to buy it.
              4 Try eBay. A simple item description is best. Note down the weight, karat and any distinguishing marks on the ring. Remember that the buyer will be unable to try it on, so include clear, high-quality photographs. A classified ad in your local newspaper or on Craigslist might work as well.
              5 Ordinary gold wedding rings often have little resale value, despite the craftsmanship or emotional investment. If all else fails, you can try to sell your ring for scrap. Be warned that you will in all likelihood receive around 25 percent of the ring's worth.

            Tuesday, March 4, 2014


            How to Store Your Wedding Cake for Your First Anniversary

            Most people don't give much thought to preserving their wedding cake for their first anniversary. Someone at the reception will slip the small cake into a box, and someone's mother will take it home and pop it into her freezer. However, many of those unthinking people will be celebrating their first anniversary by chipping ice off a freezer-burned, disfigured effigy of what once sat in bakery-fresh beauty atop their wedding cake. They'll be recoiling in horror from the "old refrigerator" taste; you can't clink glasses and wash that taste down with a romantic sip of champagne.

            Instructions

              1 Designate a person to be in charge of getting and freezing the cake. Have a sturdy cardboard box a little larger than the top of the cake on hand to protect the cake.
              2 Upon arrival at home, take the cake out of the box and slide it into the freezer, being sure there's enough room that the cake won't be damaged on the way in. Walk away until the next day.
              3 The next morning, the cake will be solidly frozen. Working quickly with long pieces of clingy plastic wrap, swath the frozen cake (including the cardboard on which it sits) in the wrap, making sure there are no openings to let in "freezer air." Slide the cake back into its box and use masking tape to close all the open edges of the box. Return it to the freezer as quickly as possible (the icing is quick to melt, and as soon as it melts it will stick to the plastic wrap.) This process will ensure that your cake is frozen while still fresh, but you want it packaged back up as soon as it's frozen to prevent freezer odors from setting in.
              4 When you're ready to thaw the cake, take it out of the box and unwrap the plastic wrap while the cake is still solidly frozen.
              5 Let the cake sit for a couple of hours in open air so any condensation created as it thaws will evaporate. When the cake is thawed, you can crack open the bubbly and celebrate your one-year anniversary with a cake as tasty as the day it went in the freezer.

            Sunday, March 2, 2014

            Do you know how much the average wedding costs? The average wedding costs somewhere around $20,000. Many people don't have that type of money to spend, even on an event as important as a wedding. But who needs thousands of dollars? You just need a little help and creativity to have the wedding of your dreams.

            Instructions

              1 Plan your date accordingly. You might get a discount on wedding items if you plan your wedding in an off season, such as winter. On the other hand, the warm weather of spring and early summer make for cheap, beautiful outside weddings.
              2 Your dress doesn't have to cost hundreds, even thousands of dollars. I bought my wedding dress on e-bay for under $100. Get creative and search many venues to find the perfect dress (in both beauty and price).
              3 Keep your decorations beautiful but simple. Use flowers and decorations that are plentiful during the season that you choose to get married. Outdoor weddings need minimal decorations because nature itself is a beautiful decoration. If you wed indoors, try to find a space that is free for use, such as a home or your church.
              4 You want to have someone with some knowledge of photography to take you wedding pictures, but you don't how to pay a ton of money. Ask a college photography major, a friend who owns a photography business, or your cousin who is a great self-taught photographer. Any of these will do if for a cheap price (if not free!)
              5 Make your own cake. I know it may sound hard, but it's actually a lot easier than you think. Buy the supplies and then consult someone who has knowledge in this area. Just use you imagination. There are plenty of articles on ehow to help you.
              6 Ask for help. Ask your family to pitch in and help. Have everyone bring a couple of dishes for the reception. Use volunteer family members to help you decorate. Have an artistic member of your family print out some invitations. The possibilities to what your family and friends can help with is endless.

              Friday, February 28, 2014

              There are certain guidelines to follow when addressing wedding invitations for guests who are members of the military.

              Instructions

                1 Address the outer envelopes with full names and titles, such as Major and Mrs. John Smith. Avoid abbreviating military titles.
                2 Address the inner envelope without using either person's first name: Major and Mrs. Smith.
                3 Use the title followed by both full names on the outer envelope if the husband and wife both have the same military rank and service: Captains Mark and Joan Brown. In this scenario, the inner envelope should be addressed to: The Captains Brown.
                4 Include both of their titles and first names on the outer envelope if the husband and wife have different services and different ranks: Captain John and Major Sue Green. For the inner envelope, again drop the first names: Captain and Major Green.
                5 Separate the names on two different lines on the outer envelope, with the woman's entry appearing first, if the husband and wife who have different services and ranks also have different last names. (First line: Major Elizabeth Cook. Second line: Captain George Black.)
                6 Combine the names on the same line of the inner envelope in this situation, again putting the wife first: Major Cook and Captain Black.

              Wednesday, February 26, 2014


              How Does a Catholic Wedding Ceremony Work?

              General Overview

                Catholic weddings are highly traditional and follow a set standard, rarely deviating from the religious customs. The ceremony consists of biblical readings, a sermon, the exchange of vows and rings and the Prayer of the Faithful followed by additional prayers. The ceremony always takes place within the church--never outdoors. It is considered a public event, and the entire Catholic community is encouraged to participate in the liturgy. A very important element of a Catholic wedding ceremony is the Sacrament of Matrimony, which Catholics believe is a route toward God's grace. In many instances, the Sacrament of Matrimony is preceded by the Sacrament of Reconciliation. Catholic weddings are never held on Holy Thursday, Good Friday or Holy Saturday.

              Key Elements

                The processional is a key aspect of the Catholic wedding ceremony. The processional usually consists of altar servers, the priest, witnesses, bridesmaids and groomsmen. Traditionally, the groom processes with his parents. The bride also has the choice of processing with her parents. The bride usually is led down the aisle by her father, who escorts her on his right arm. If the bride's father cannot walk her down the aisle, tradition dictates that she walk alone. During the nuptials, the bride and groom must promise to continue observing the Catholic faith and raise their children as Catholics, as well. However, if one of the partners is not Catholic, he is not required to make the same promises.

              The Ceremony

                After the processional, the official ceremony begins with a greeting by the priest to the bride and groom, and their guests. The priest's greeting is followed by prayers, readings from the Old and New Testament, a psalm, the "hallelujah" and a Gospel reading. The priest then gives a sermon, which may contain personal references to the bride and groom. Finally, the vows and rings are exchanged by the couple. The rings are blessed before they are placed on the partners' fingers. Then the congregation participates in the Prayer of the Faithful. If the ceremony takes place during a Mass, the Liturgy of the Eucharist occurs after this prayer. If the ceremony does not include Mass, the service concludes with the Lord's Prayer and a blessing. To conclude the Mass, the priest issues a final blessing followed by the dismissal.

              Monday, February 24, 2014


              How to Coordinate a Wedding Ceremony

              Coordinating a wedding ceremony is a huge job for one person. Take some of the pressure off yourself by delegating tasks to friends and family members early on. Many weddings take months to plan, so start as early as possible. Choose the theme first, as this will help simplify decision-making issues. To reduce stress, perform tasks one at a time so you don't feel overwhelmed.

              Instructions

                1 Make a written plan or timeline. List the necessary tasks according to how far in advance they need to be completed. The first priorities should be those tasks that need to be completed as soon as possible, such as booking a venue. Least important priorities should be lighting and decorations. They can be handled closer to the wedding date.
                2 Create a diagram of how the wedding ceremony will be executed. Give copies to all members of the wedding party and the officiant. As the wedding draws near, rehearse several times with all parties in attendance. Rehearsal is especially important for younger members of the wedding party, such as the ring bearer and flower girl. It may take young children longer to learn their parts.
                3 Check on the preparations as they progress. Ensure that the caterer has your event on his schedule. Call the venue to double-check on times and amenities. Check on the progress of the decorating. Ideally, decorations should be in place the day before the event. If that is not allowed, they should be completed several hours before the ceremony. Give yourself enough time so that you aren't rushing at the last minute.
                4 Watch over the wedding as it happens to ensure that everything is running smoothly. If you are the bride, hand over the coordinating task to someone you trust who is not in the wedding. The coordinator should be available to help the bridal party prepare to walk down the aisle. The coordinator is also responsible for being sure the music and the seating go smoothly.

              Friday, February 21, 2014


              How to Become a Wedding Officiate in California

              You may want someone close to you officiate at your wedding ceremony. This may be a special religious leader, a political leader, member of the court system, or even a family member who applies for a permit to perform your wedding ceremony. California law allows for you to become a wedding officiant in a number of ways, most of which require a background in religious or legal duties.

              Instructions

              Officiate as Part of Your Job Duties

                1 Become a priest, rabbi, minister or authorized person of any religious denomination recognized in the state of California. The requirements for becoming a member of the clergy for your church will vary, so check with your church if you wish to go this route.
                2 Perform the ceremony as a judge or magistrate. If you are a judge or magistrate, a retired judge or a judge who has resigned from office, you are eligible to officiate at weddings in California.
                3 Officiate weddings as a publicly elected official. If you are a legislator, constitutional officer, member of Congress or elected mayor of a city, you may officiate at weddings while you hold that office.

              Apply to Become a Deputy Commissioner of Civil Marriages

                4 Go to your county clerk's office to get an application to become a Deputy Commissioner of Civil Marriages. This will allow anyone who is otherwise not eligible, to officiate one marriage on the date specified on the Appointment and Oath of Office form.
                5 Fill out the Appointment and Oath of Office form. Return the form to the county clerk.
                6 Request the marriage license from the couple getting married. Check the license for validity, including the expiration date.
                7 Officiate the marriage. There is no specific speech that must be given at the ceremony, but the parties wishing to be wed must state that they take each other as husband and wife.
                8 Print in black ink the date and place of the marriage on the license. Sign the license and write your title of Deputy Commissioner of Civil Marriages and your address. Have at least one witness enter their signature and address on the license in black ink. Return the license to the county recorder within four days of the marriage.

              Thursday, February 20, 2014

              A wedding budget can begin to dwindle quickly as the bride and groom pay for a venue, vendors, flowers and more. If you're trying to make the most of your wedding budget, you can cut costs with some do-it-yourself crafts, including making your own programs. For warm-weather weddings, programs fashioned as fans can be informative, decorative and functional. Recruiting the bridal party to help for a night can make this project go quickly and serve as a fun get-together as well.

              Instructions

                1 Download a free template for a wedding program fan (see Resources below). When downloading, the template will open in your word-processing program. The template will have two identical shapes that are connected to each other so that they form a mirror image when folded.
                2 Determine what you want to have on the front and back of the fan. Typically, the wedding-program text is on the front, and you can put something decorative, such as the wedding date in a pretty font or a photo of you and your new spouse, on the back.
                3 Type the text for the wedding program on the left side of the fan template, which will be the front. Most wedding programs include information such as the names of the bride's and groom's parents and bridal party, the order of the ceremony, any songs or readings in the ceremony and a personal note from the couple.
                4 Insert a photo, date or monogram on the right (back) side of the template.
                5 Print out the completed template onto a piece of card stock in a color that coordinates with or complements your wedding colors.
                6 Cut the template out of the card stock, carefully following the outline. Do not cut the strip that connects the front and back of the template, as you want them to be held together.
                7 Flip the template over so that the text/graphics are facing down, and fold the template in half along the strip where the two halves meet. Be sure that the sides are lined up evenly before heavily creasing. After folding, the text will be on the outside and visible.
                8 Apply glue to the top half of a tongue depressor. Insert the tongue depressor into the opening on the bottom of the fan, in between the front and back created by folding. Press down firmly to secure both sides of the card stock to the tongue depressor, which is the handle of the fan.
                9 Tie a decorative ribbon around the handle where it meets the fan, or affix a fabric flower directly underneath the fan on the handle.

              Tuesday, February 18, 2014

              The veil is an important part of the bride's wedding attire. It's a traditional element that completes the bridal look. Veils are typically made of very thin, sensitive material that wrinkles easily. This can be frustrating because as you move things around and try it on several times, you might find that it has been wrinkled. Because it is so thin, you have to take great care when ironing your veil so you don't burn or ruin it. Make sure you leave some time to do this a few days before the wedding so you're not rushing around at the last minute to get the wrinkles out.

              Instructions

                1 Set up your ironing board. Fill the iron with water halfway up, plug it in and turn it on. Set the iron to the lowest setting possible or "low heat." Allow the iron to warm up.
                2 Drape the veil across the ironing board and flatten it out, smoothing it to make sure there aren't any bunched sections. Place a clean rag over the veil. Carefully run the iron over the clean rag and use steam. Make sure you move in a slow but consistent and steady manner. Move the clean rag and veil as you need to continue ironing.
                3 Hang the veil on a hanger and hang on the shower curtain rod. Plug the blow dryer in and turn it on a low setting. Hold the edge of the veil with one hand and carefully blow dry the veil, moving the blow dryer on the veil fairly quickly. The steam from the iron will leave the veil damp; you don't want to leave it damp because mildew can grow.
                4 Leave the veil hanging in an area where it will not be touching other items and can hang as high up as possible so it stays off the floor.
                5 If the veil becomes wrinkled again before the wedding and you don't have time to iron it and blow dry, then just turn the shower on really hot and close the bathroom door so the steam builds up. Leave the veil on a hanger and hang in the bathroom. Leave in there for 10 to 15 minutes and the wrinkles should come out.

              Sunday, February 16, 2014


              How to Become a Disney Wedding Planner

              Walt Disney World and other Disney properties are known as places where dreams come true. Disney weddings are growing in popularity, with weddings planned and conducted on Disney properties every day. Disney wedding planners customize each wedding so every couple experiences their fairy tale wedding. Disney cast members take care of everything. Disney started hosting weddings and providing planners in 1991.

              Instructions

                1 Become a wedding planner. No training or formal education is required. Nevertheless, there are classes available for wedding planning. Gain experience by attending weddings, helping friends and family plan their weddings, attending bridal shows, studying wedding magazines, interviewing brides and talking with businesses that serve weddings. These businesses include caterers, florists, DJs and various faith ministers.
                2 Interpersonal and organization skills are important. These traits might be natural or learned. A wedding planner schedules cake tastings for the couple, helps plan the reception menu and finds DJs for the couple's review. Create checklists and carry a binder to record details for each couple and to store paperwork.
                3 Listen to what the couple wants. Try to fulfill their wishes as well as steer them toward a decision that might work for them. Present the couple with a portfolio of wedding ideas or previous weddings. Take photos at each wedding you've planned and show these to the couple.
                4 Start a wedding-planning business or work for one, depending on your preference.
                5 Consider having a specialty. A wedding planner provides many services, but some specialize in consultation or ensuring wedding day preparations go according to the schedule.
                6 Join the Disney wedding planning team as a consultant by looking online at disney.go.com/DisneyCareers/ to look for openings. If there are no openings, contact wedding services and ask for any openings that might be coming available. Send in a resume even if no positions are presently available.